🧪 Local Development
Before building for the app stores, test the app on your own phone or simulator to make sure everything works.
1️⃣ Step 1: Install Expo CLI
npm install -g expo-cli eas-cli2️⃣ Step 2: Start the Development Server
cd packages/mobile
npx expo start
This starts the Expo development server and shows a QR code in your terminal.
3️⃣ Step 3: Run on Your Phone
📱 Using Expo Go (Quickest)
Install the Expo Go app on your phone:
📸 Scan the QR code:
- iPhone: Open the Camera app and point it at the QR code
- Android: Open Expo Go and tap "Scan QR code"
✅ The app will load on your phone.
⚠️ Expo Go Limitations
Expo Go is great for quick testing, but some features (push notifications, Stripe payments) won't work in Expo Go because they require native modules. For full testing, use a development build.
🖥️ Using a Simulator/Emulator
🍎 iOS Simulator (Mac only)
- Install Xcode from the Mac App Store
- Open Xcode → Settings → Platforms → Install iOS Simulator
- Run:
npx expo start --ios
🤖 Android Emulator
- Install Android Studio
- Open Android Studio → More Actions → Virtual Device Manager → Create Device
- Choose a device (e.g., Pixel 7) and download a system image
- Run:
npx expo start --android
4️⃣ Step 4: Connect to Your API Server
The app needs to reach your KitchenAsty API server. During development, you have several options:
🏠 Option A: Local Server on Same Machine
If the API server is running on the same computer (e.g., via docker compose up):
Edit packages/mobile/app.json and set apiBaseUrl to your computer's local IP:
{
  "expo": {
    "extra": {
      "apiBaseUrl": "http://192.168.1.100:3000"
    }
  }
}
Find your local IP with:
- 🍎 Mac:
ipconfig getifaddr en0 - 🐧 Linux:
hostname -I | awk '{print $1}' - 🪟 Windows:
ipconfig(look for IPv4 Address)
⚠️
Don't use localhost or 127.0.0.1 — that refers to the phone itself, not your computer. Use your computer's actual IP address on the local network.
🌐 Option B: Production Server
Point the app directly at your production server:
{
  "expo": {
    "extra": {
      "apiBaseUrl": "https://api.yourdomain.com"
    }
  }
}
This is the simplest option and tests the real connection.
5️⃣ Step 5: Test Core Flows
Walk through these flows to verify everything works:
✅ Basic Testing Checklist
Here's what each screen should look like when working correctly:
| Home Screen | Menu Screen | Item Detail |
|---|---|---|
 |  | 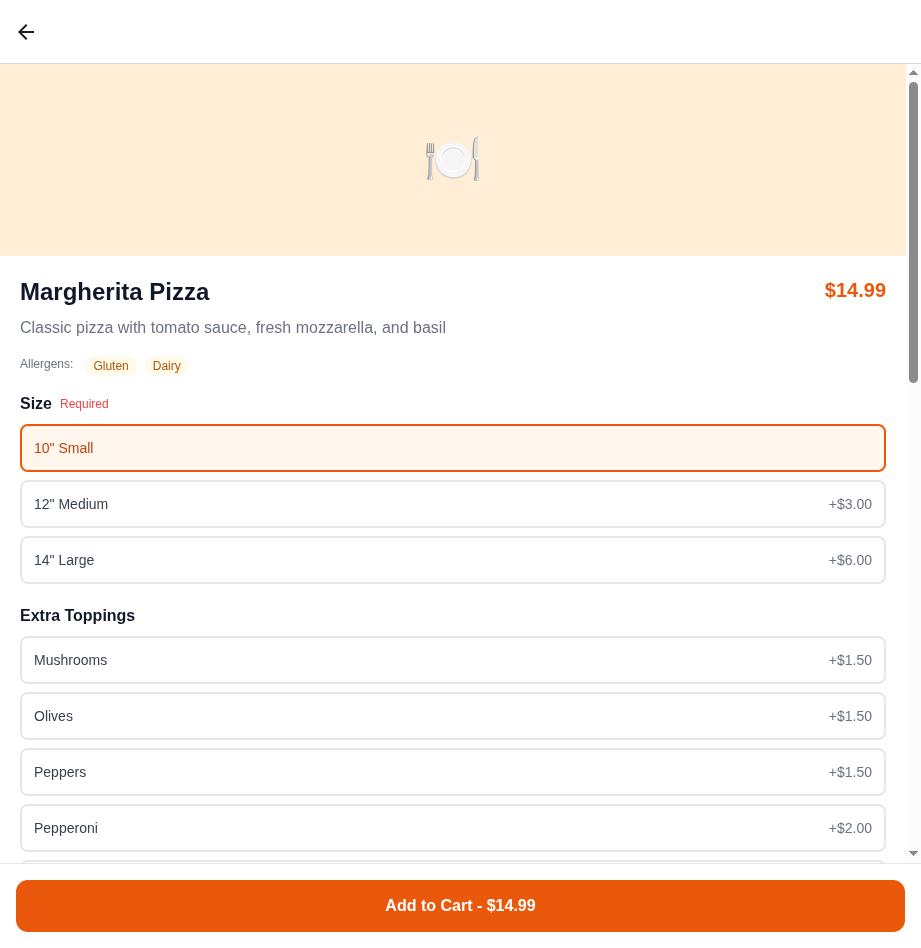 |
- [ ] 🏠 App loads and shows the home screen
- [ ] 🍔 Menu screen displays categories and items
- [ ] 👆 Tapping a menu item opens the detail modal
- [ ] 🛒 Adding an item to the cart works
- [ ] 💰 Cart shows correct items and subtotal
- [ ] 📝 Register a new account
- [ ] 🔑 Log in with the account
- [ ] 📦 Place a test order (cash payment)
- [ ] ✅ Order confirmation screen shows
- [ ] 📜 Order history displays the order
- [ ] 📍 Locations page shows your restaurant(s)
- [ ] 🌍 Language switcher changes the UI language
💳 Testing Stripe Payments
Stripe payments require a development build (not Expo Go). Use Stripe's test card numbers:
| Card Number | Result |
|---|---|
✅ 4242 4242 4242 4242 | Successful payment |
❌ 4000 0000 0000 9995 | Declined payment |
Use any future expiry date and any 3-digit CVC.
🔨 Development Build
For testing features that don't work in Expo Go (push notifications, Stripe), create a development build:
# Install the dev client
npx expo install expo-dev-client

# Build for your device
eas build --profile development --platform android
# or for iOS:
eas build --profile development --platform ios
This creates a custom version of the app with all native modules included. Install it on your device and connect it to the Expo development server.
🔧 Common Issues
❌ "Network request failed"
The app can't reach the API server. Check:
- ✅ The
apiBaseUrlinapp.jsonis correct - 📶 Your phone and computer are on the same WiFi network (for local servers)
- 🖥️ The API server is running (
curl http://your-ip:3000/api/health)
🔴 Metro bundler errors
# Clear the cache and restart
npx expo start --clear
📦 "Unable to resolve module"
# Reinstall dependencies
rm -rf node_modules
npm install
➡️ Next Step
Once you've verified the app works, continue to EAS Build Setup to configure cloud builds.